
Here I’ll give you some tips and tricks to making the best and EASIEST homemade butter. Spoiler alert – you only need 1 ingredient.

Homemade Butter
I know what you’re thinking – ‘why would you want to make your own butter?’. And it’s a good question. For me, there’s 3 main reasons why:
- Cheaper – Have you seen the price of butter these days?! Here you’ll need one ingredient which is usually far cheaper.
- Easy – It’s way too easy not to!
- Satisfying – Making your own butter brings with it a nice accomplishing feeling with it once you’re done.
The Magic Ingredient
The main ingredient you need to make butter is cream. Heavy Cream (US) or Double Cream (UK) to be specific. Alongside this you’ll just need ice/cold water and some salt (optional).
What you’ll need to make butter
There’s a variety of different ways to make butter, here are the most popular choices for equipment:
- Hand Mixer (today’s choice)
- Stand Mixer
- Food Processor
- Mason Jar
All methods are extremely similar and all work on the same basic process.

How to make Butter
What you’re essentially trying to do is whip the cream past stiff peaks, past whipped cream, and continue whisking it until it starts to split. Once the cream splits, if you continue whipping you’ll start to separate the cream into solids and liquids. In turn, what you’re left with is butter (solid) and buttermilk (liquid).
Don’t waste the Buttermilk!
Whilst we are indeed here for the butter, you certainly don’t want to waste the buttermilk. Think of it as a bonus from making the butter! Buttermilk is great for baking, marinating meat or even as a base for salad dressings and dips.

How to remove buttermilk from butter
Once you’ve full separated the butter from the buttermilk, simply pour the buttermilk into a bowl. From there, use a spatula to press the butter against the bowl to squeeze out the buttermilk.
Ice Water
By pouring in ice water (or at least cold water) you can more easily further separate the buttermilk from the butter. Mixing this a few times, draining the ice water as you go, until the butter is fully ‘de-buttermilked’ (technical term).
How to store homemade butter?
Tightly cover and place in the fridge. It can also be frozen and thawed in the fridge.
How long does homemade butter last?
If you’ve managed to squeeze all of the buttermilk out it will last 3-4weeks tightly covered in the fridge. If some buttermilk still remains it will spoil much sooner, so really take the times to extract as much as you can.

How to use homemade butter?
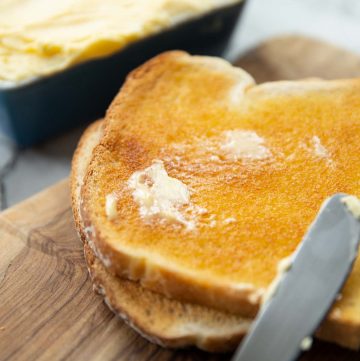
Besides the obvious using it on grilled cheese and sandwiches, you can also mix in things like fresh herbs. Garlic also works great to make a garlic butter, or even honey to make honey butter!
If you’re looking for another sandwich essential check out my easy tutorial on How To Make Mayonnaise!
And there we have it! All my top tips and tricks for easily making homemade butter. Let’s tuck into the full recipe shall we?!

How to make Butter (Full Recipe & Video)
Homemade Butter
Equipment
- Spatula
- Stand Mixer or...
- Hand Mixer & Large Bowl or...
- Food Processor or...
- Mason Jar
Ingredients
- 2 cups / 500ml Cold Heavy Cream (US) or Double Cream (UK) (see notes)
- Fine Salt, to taste (optional)
- Ice Water, as needed (1 cup should suffice)
Instructions
Hand Mixer
- In a large bowl (make sure it's big or you'll make a mess) begin whipping until the cream forms stiff peaks, then continue whipping until it starts to turn into tiny lumps. Keep going until it starts to separate into butter and buttermilk. Use a spatula to squeeze out the buttermilk, then drain and store (see notes for buttermilk uses). Pour in ice water, keep pressing out the buttermilk from the butter until it's gone (repeat a few of times, then drain ice water once it's clear). Stir in a pinch of salt (optional) then store.
Mason Jar
- Pour milk into a mason jar, tightly seal then shake like your life depends on it. This is hard work but very rewarding once it's done. Keep shaking until the butter begins to split (you'll hear it turn sloppy). Pour out buttermilk (see notes for buttermilk uses) and place the solids into a bowl. Pour in ice water and use a spatula to press out all the buttermilk from the butter. Repeat a few times until you've squeezed out all the buttermilk then drain out ice water, stir in a pinch of salt (optional) and store butter.
Stand Mixer
- Attach whisk to stand mixer and pour cream into a bowl. Begin whipping on low then turn to medium. Whip past the point of stiff peaks until the cream starts to split into butter and buttermilk. At this point I usually attach the paddle to keep whipping to split it further. Pour out buttermilk (see notes for buttermilk uses) and pour in ice water. Use a spatula to press out all the buttermilk from the butter, then repeat a few of times until it's all removed. Drain off ice water, stir in a pinch of salt (optional) and store.
Food Processor
- Pour milk into food processor and turn on motor. Keep it on past the cream turning to whipped cream, right the to point where the butter splits into butter and buttermilk. Pour out buttermilk (see notes for buttermilk uses) then add the butter to a bowl. Pour in ice water and use a spatula to squeeze out as much buttermilk from the butter as possible. Drain away and repeat a couple of times. Stir a pinch of salt through the butter (optional) then store.

This is so cool! I’ve never made homemade butter, but now i want to!
You totally should! 🙂
I adore homemade butter, I just don’t seem to make it very often! Definitely going to now though!
I always forget how easy it is to make too!
Thanks for this homemade butter recipe. It is nice to know just how easy it is to make butter!
Super easy isn’t it?!
I love making butter at home – it’s so versatile to different variations/flavors. Great technique!
Yup, so versatile!! 🙂
This is brilliant! So smart to make homemade butter, and your steps are so helpful!
Thanks so much Marlynn 🙂
This was so easy to make and absolutely delicious!
Awesome to hear! Glad it was a success 🙂